Today, I will share it all with you.
I remember the first time I tried photographing a hawk in my backyard — blurry mess, completely overexposed, and the bird flew off before I could even figure out my autofocus. That was maybe fifteen years ago. Since then, I’ve dragged my camera gear through swamps, savannas, and frozen lakeshores, and I’ve picked up a few things along the way. Some of these lessons came from reading. Most came from screwing up in the field.

Camera Settings You Actually Need to Know
None of the fancy fieldcraft or lens talk matters if your settings are wrong when the moment happens. Animals don’t wait around for you to fumble through menus. Trust me on that.
Shutter Speed — this is the big one. If you’re shooting a deer standing still, you can get away with 1/250 of a second, maybe even a touch slower if your hands are steady. But anything moving? You need to crank it up. Birds in flight? I won’t go below 1/1000, and honestly I prefer 1/2000 to 1/4000 for anything with fast wingbeats. I once nailed a kingfisher mid-dive at 1/3200 and the feather detail was absurd. Slower than that and you’d have gotten a colorful smear.
Aperture is where things get interesting. I tend to hover between f/5.6 and f/8 for most wildlife work. That range gives you enough depth of field to keep the whole face sharp, but still blurs out whatever mess is behind your subject — bushes, fences, other photographers. When light gets low, I’ll open up to f/4, but the margin for error on focus gets real thin at that point.
ISO used to terrify me. I’d keep it at 100 or 200 and wonder why everything was dark or blurry. Here’s what I wish someone had told me years ago: a noisy sharp photo beats a clean blurry one every single time. Modern cameras handle ISO 1600, 3200, even 6400 pretty gracefully. I set mine to Auto ISO with a ceiling around 6400, and I just let the camera sort it out while I worry about framing and timing. Life-changing approach, honestly.
Autofocus Mode is the other make-or-break setting. You want continuous autofocus — Canon calls it AI Servo, Nikon and Sony call it AF-C. This mode keeps tracking your subject as it moves, constantly adjusting focus. Pair that with zone or dynamic area focus points and you give the camera a fighting chance of staying locked on something that’s darting through brush or swooping across the sky. Single-shot autofocus? That’s for flowers. Not animals.
Picking Lenses (Without Going Broke)
Let’s talk glass. Your lens choice has a bigger impact on your wildlife images than almost any other single decision, and I say that as someone who’s gone through way too many lenses to admit.

Telephoto Zooms are where most people should start. A 100-400mm or 150-600mm zoom gives you reach when you need it and lets you pull back quickly when an animal wanders closer than expected. On safari, I’ve gone from 400mm on a distant lion to 150mm in about two seconds when a giraffe decided to investigate our vehicle. You can’t do that with a prime.
Super Telephoto Primes — the 500mm, 600mm, 800mm beasts — are the dream lenses. The sharpness is unreal, the autofocus is faster, and they gather more light than any zoom at the same focal length. They’re also the price of a used car. If you’re serious about bird photography or you’re working professionally, these become hard to live without. But for most of us, a good zoom covers 90% of what we need.
Teleconverters are sneaky good value. Slap a 1.4x on your 400mm and suddenly it’s a 560mm. A 2x makes it an 800mm. You lose a stop or two of light and maybe a hair of sharpness, but paired with a quality base lens, they’re a budget-friendly way to extend your reach. I keep a 1.4x in my bag at all times.
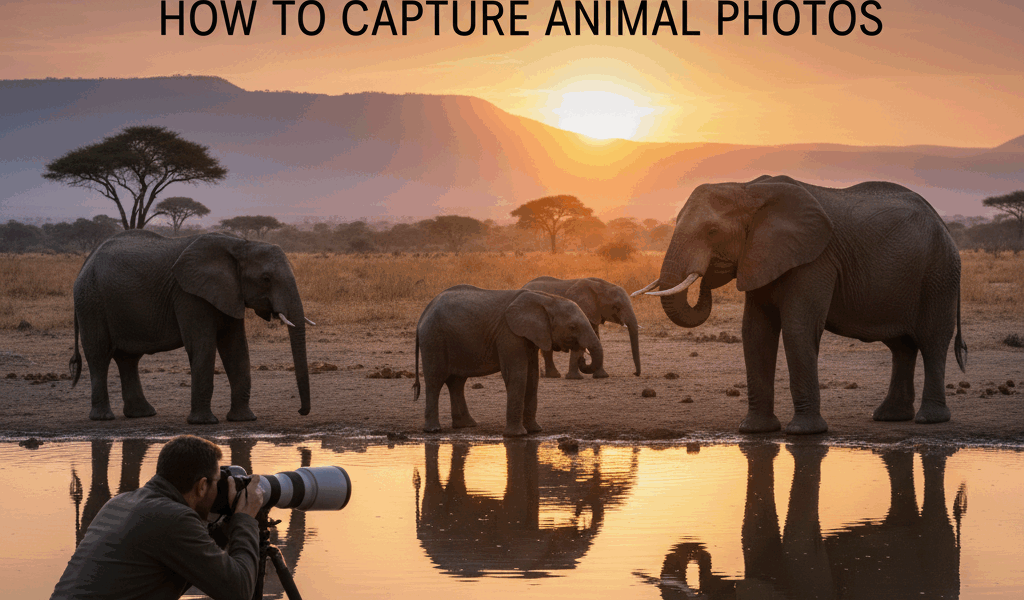
Wide Angles — and yes, I’m serious. Don’t ignore them. Some of my favorite wildlife shots were taken with a 24-70mm. An elephant at close range with the savanna stretching behind it tells a completely different story than a tight headshot. Environmental portraits add context that telephoto images simply can’t deliver.
Fieldcraft: The Stuff That Actually Matters Most
Someone with a mediocre lens and excellent fieldcraft will consistently outshoot someone with top-tier glass who doesn’t know how to approach an animal. I’ve seen it happen dozens of times.
Do Your Homework. Before I go anywhere new, I spend hours reading about the animals I want to photograph. What do they eat? When are they active? Where do they hang out at different times of day? Most wildlife is most active at dawn and dusk, but the specifics vary wildly. Owls have different schedules than warblers. Knowing these patterns is half the battle.
Move Like You’re Made of Molasses. I cannot overstate this. Slow, deliberate movement is everything. Quick gestures trigger flight responses in almost every wild animal. Take a step. Stop. Wait. Take another step. Don’t stare directly at the animal — they read eye contact as a threat. Approach at an angle rather than head-on. It feels ridiculous at first. Then you realize you’re twenty feet from a fox that hasn’t spooked, and it clicks.
Use Whatever Cover You Can Find. Trees, boulders, tall grass, fallen logs — all of it helps break up your outline. I’ve crawled through mud on my stomach to get behind a mound of earth near a badger set. Was it dignified? Absolutely not. Did I get the shot? You bet I did. Some folks use portable blinds near water holes or game trails, which works great if you have the patience to sit in one spot for hours.
Sometimes, Just Sit Still. This is the hardest advice for beginners. Find a promising spot — near water, a feeding area, or a well-worn trail — plant yourself, and wait. Animals that come to you behave more naturally than animals you’ve stalked toward. They feed, they groom, they interact with each other. Those are the images that really sing.
Watch for Stress Signals. If an animal stops feeding and stares at you, you’re too close. If it starts repositioning away, you’re definitely too close. Ears pinned back, raised hackles, alarm calls from birds — these are all signs you need to back off. Recognizing them protects the animal and, frankly, protects your future shooting opportunities at that location.
Ethics Aren’t Optional (A Rant, Sort Of)
I feel pretty strongly about this, so bear with me. Every one of us with a camera in a wild space has a responsibility to the creatures we’re photographing. Full stop.
Don’t Bait Animals. I know it’s tempting. I’ve seen people toss mice into fields to attract raptors. It works — and it’s awful. Feeding wild animals changes their behavior, can make them sick, and habituates them to humans in dangerous ways. The shot isn’t worth the harm. Period.
Nesting Sites Are Sacred. Breeding animals are vulnerable. If you find an active nest or den, keep your distance — generous distance. I once watched a photographer creep so close to a plover nest that the parent bird abandoned it. Three eggs lost. Don’t be that person. If adults show any agitation, leave immediately.
Stick to the Trails. In protected areas, stay on designated paths. Going off-trail damages vegetation and disturbs ground-nesting species you might not even see. Use your telephoto lens — that’s literally what it’s for.
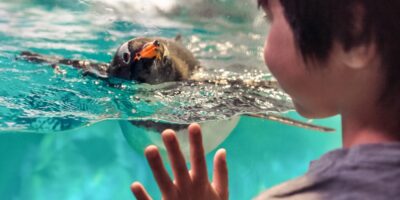
Don’t Fake It. Captive animals aren’t wild animals. If you photograph at a game farm or sanctuary, be upfront about it. Passing off controlled shots as wild encounters undermines the credibility of wildlife photography as a whole.
Think Before You Geotag. I learned this one the hard way. Sharing the exact location of a rare owl roost on Instagram brought a flood of photographers to the spot within days. The owl left. Now I’m intentionally vague about sensitive locations, and I’d encourage you to do the same.
Working With Natural Light (Your Best Friend and Worst Enemy)

Light makes or breaks a wildlife photo. I don’t care how rare the animal is or how perfect the behavior — if the light is garbage, the image suffers. Understanding natural light is what separates good shots from the ones that make people stop scrolling.
Golden Hour Is Real Magic. That window right after sunrise and right before sunset? It’s not hype. The light comes in warm, soft, and directional. Fur glows. Feathers shimmer. Even a common sparrow looks regal in golden hour light. I plan my entire shooting schedule around these windows when I can. The rest of the day? I’m scouting, or I’m resting.
Don’t Curse the Clouds. Overcast days are actually fantastic for wildlife photography, and most people don’t realize it. Cloud cover acts like a massive softbox — it kills harsh shadows, reduces contrast, and makes colors pop. Animals also tend to stay active longer on cloudy days since they’re not dealing with intense heat. Some of my best bird portraits were shot under gray skies.
Backlighting Can Be Stunning. When the sun sits behind your subject, you get this gorgeous rim of light outlining the animal. It’s especially beautiful on anything translucent — think the edges of feathers or the fine hairs on a mammal’s back. The trick is exposing for the subject, not the bright background. You might blow out the sky, and that’s fine. The backlit glow is worth it.
Open Shade Works Wonders. Animals resting under trees or in shaded areas get this beautiful, even light with no squinting, no harsh shadows. The only gotcha is green color casts from foliage reflecting light onto your subject. A quick white balance adjustment in post fixes that easily enough.
Midday Sun? Go Get Lunch. I’m only half joking. Overhead light at noon creates unflattering shadows under eyes, washes out colors, and cranks up contrast to uncomfortable levels. Can you work with it? Sure, if you find shaded subjects or go for silhouettes. But generally speaking, midday is my lunch break or my scouting time. The light just isn’t cooperating.
Composition Tips That’ll Make Your Images Pop
Good composition is what turns a record shot into a photograph someone wants to hang on their wall. And look, I’m not going to pretend I nail composition every time — I absolutely don’t. But keeping a few principles in mind has drastically improved my hit rate over the years.
Eyes Are Everything. If the eye isn’t sharp, the photo doesn’t work. Doesn’t matter if the rest of the body is tack-sharp and the composition is perfect. Viewers go straight to the eyes. I set my focus point directly on the nearest eye of the subject and build the rest of the shot from there. A slightly soft body with a razor-sharp eye? Totally works. The reverse? Trash it.
Rule of Thirds. You’ve heard it a thousand times because it works. Place the subject’s eye at one of those thirds intersection points and the image immediately feels more dynamic than a centered composition. It’s not a law — break it when it makes sense — but as a starting point, it’s reliable.
Give ‘Em Room to Move. If a bird is facing left, put more space on the left side of the frame. An animal facing right? More space on the right. This applies even to resting subjects — if their body position implies direction, honor that direction with space. Images where animals are crammed against the edge they’re facing feel claustrophobic and awkward.
Watch Your Backgrounds. I can’t tell you how many otherwise great shots I’ve ruined by not noticing a bright branch or a trash can behind my subject. Before you press the shutter, quickly scan the background. A slight shift left or right, or even crouching lower, can completely clean up distracting elements.
Show the Habitat. Tight portraits are great, but don’t forget to zoom out sometimes. A polar bear framed against vast Arctic ice or a leopard lounging in an acacia tree tells a story that a headshot never could. These environmental portraits are some of the most powerful wildlife images you can make.
Capture the Behavior. Static animals are fine. Behaving animals are better. Feeding, fighting, playing, grooming, courting — these moments bring images to life. You need patience and you need to keep your finger near the shutter, because behavioral moments vanish in a blink. But when you nail one? There’s no better feeling in photography.
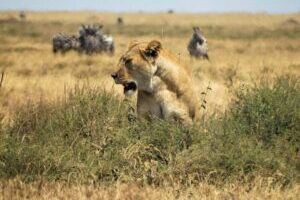
Safari Photography: What I Wish I’d Known My First Time

My first safari, I made every rookie mistake imaginable. Wrong settings, wrong position in the vehicle, lens covered in dust by noon. If you’re planning a safari — whether it’s East Africa, Southern Africa, or anywhere else — learn from my failures.
Talk to Your Guide About Positioning. Your guide knows where the animals are, but they don’t always know what angle works best photographically. Tell them you want the sun behind you in the morning. Ask them to position the vehicle broadside to the subject when possible. A good guide will work with you, but they need to know what you’re after.
Stabilize Everything. Shooting handheld from a moving vehicle with a 400mm lens is a recipe for soft images. Get a bean bag — seriously, a simple bag of dried beans draped over the window ledge is one of the best stabilization tools there is. Purpose-built vehicle mounts are even better. Just don’t rest your lens directly on the metal doorframe, because the engine vibration will rattle through every shot.
Read the Scene Before It Happens. Experienced guides can often tell when a predator is about to hunt or when a herd is getting restless. Pay attention to what the animals are doing and have your settings dialed in before the action starts. If you’re fiddling with buttons when a cheetah launches into a sprint, you’ve already missed it.
Dust Is Your Enemy. African savanna dust is insidious. It gets into everything — lens barrels, sensor chambers, viewfinder eyepieces. Bring way more lens cloths than you think you’ll need. Seal your gear in ziplock bags between game drives. When you swap lenses, do it inside the vehicle with windows up. I learned that last one after finding a constellation of dust spots across an entire afternoon’s worth of photos.
Be Considerate of Others. Unless you’ve booked a private vehicle, you’re sharing with other photographers and tourists. Rotate positions, share the best spots, and communicate what you’re hoping to capture. Safari photography is infinitely better when everyone cooperates rather than elbowing for position. I’ve had some of my best wildlife encounters precisely because a travel companion spotted something I’d missed.


Leave a Reply